(These notes are combination of personal experience and information still in print in Leonard Lee's seminal work on the subject "The Complete Guide To Sharpening" Taunton Press. Published 1994 and now in soft cover, 240 pages with Black & White photographs and drawings).
The intricacies of sharpening hand saws and the tools and equipment associated with the activity, remains one of our most sought after group of product enquiries and information requests. Note that this data sheet will focus on Western style handsaws with un-hardened, sharpenable teeth. No particular reference is made to Japanese hand saws for these are, as a class, for most practical purposes, un-sharpenable due to the complexity of tooth grind geometry and, in the case of the Gyokucho factory made range we sell, the fact that the teeth are case hardened. A classic cross cut dozuki for example has three ground facets on each tooth and may have up to 25 teeth per inch or a 1.0mm tooth pitch. If you have the eyes and willingness to attempt sharpening Japanese saws we can supply appropriate feather files.
Some terminology
- Teeth Per Inch - (TPI) still widely used as a measure of tooth count.
- Points Per Inch - (PPI) a less used measure of tooth count.
- Pitch - the distance between adjacent tooth tips - usually used in describing a blade using metric measurements.
- Gullet - the valley between the teeth which carries the shaving.
- Set - the degree of flare between usually (but not always) alternate teeth.
- Thickness - the native thickness of the saw blade
- Kerf - the width of the resultant cut.
- Crosscut - a saw tooth pattern optimised for cutting across the grain.
- Rip - a saw tooth pattern optimised for cutting down the grain.
- Combination - a saw tooth pattern optimised as far as possible for cutting both across and down the grain.
- Hardened Tooth - a saw with hardened teeth which is practically impossible to hand sharpen although, depending on the hardness, diamond files may be worth a try.
- Hardness - a measure of the native hardness of the saw blade usually measured in Rockwell C (Rc). Implies a trade-off between ability to be sharpened and edge holding degree.
- Fleam Angle - the skew or shear angle when filing crosscut teeth.
The Tools & Equipment
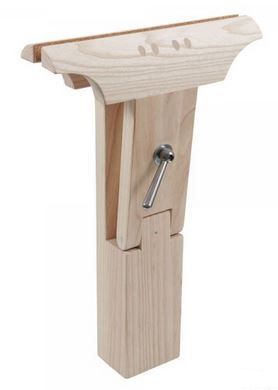
Vice - a modern take on a saw vice. If you are fortunate enough to have a classic saw vice then make provision for it in your will for they are now a scarce and valued item.
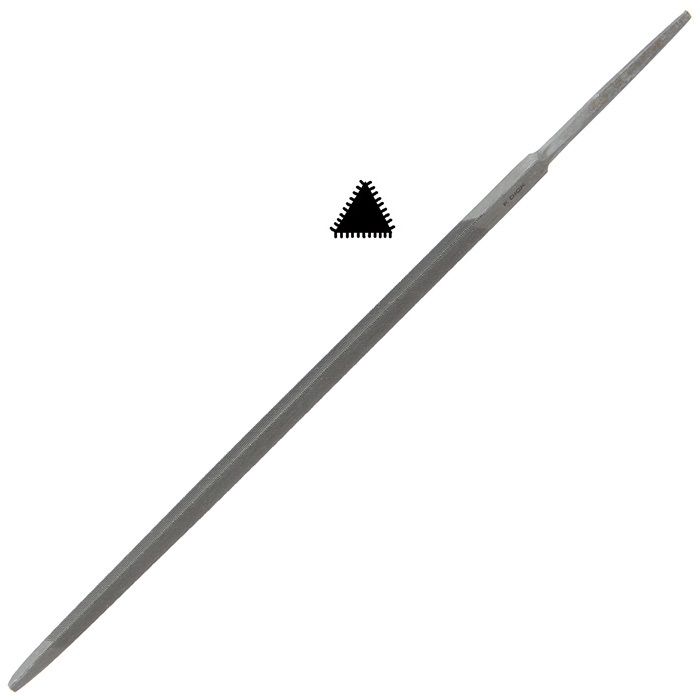
Files - The essential kit is some saw files which are a special triangular in section file with the 60 degree three corners of the file having a slightly rounded shape. This is desirable to deliver a rounded bottom to the tooth gullet which will resist the tendency of the saw to develop cracks which will start much more readily from the bottom of a sharp V cut. The size of the file should suit the scale of the teeth being filed. The filing stroke should work the full face of the tooth.
Note: We can now supply a unique 100mm isosceles triangular file with one 35 degree angle, a much more acute angle compared to a conventional equilateral triangular shape with three 60 degree corners. This suggests an excellent option for working very fine tooth count blades. See HERE.
Leveling File - used to level the tops of an existing array of teeth. Typically a 200 or 250mm second cut smoothing file.
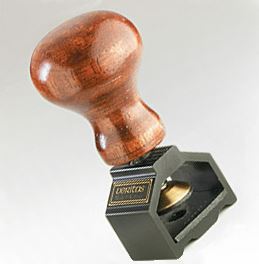
Jointer Edger - a useful accessory from Veritas. Also usable on cabinet scrapers.
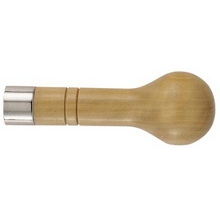
File Handles - conventional wooden and plastic handles.
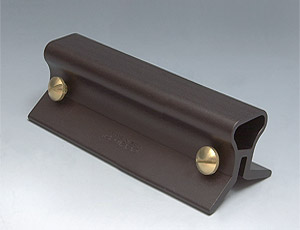
Saw Set - used to put a predictable sideways flare on teeth.
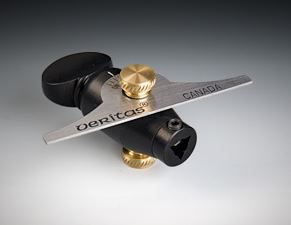
Protractor Handle - very useful device from Veritas.
Rear Handle - useful handle for the rear end of the file
Suggested File Selection
- 100mm (4 inches) - 14tpi and finer
- 130mm (5 inches) - 11 to 14 tpi
- 150mm (6 inches) - 9 to 10 tpi
- 180mm (7 inches) - 5 to 7 tpi
The Procedure
Clamping - mount the saw in a vice, either manufactured for purpose or, alternatively, you can use a self made setup with clamped wooden blade cheeks which can go into your bench vice. Wooden blade cheeks can be marked with the fleam angle you intend to use.
Lighting - Arrange an angled light source to assist with keeping track of which tooth you are working on.
Jointing - run a leveling file over the teeth to the point where the lowest tooth is just touched.
Shaping & Rake Angle - at this stage file square across a regular array of teeth which, in the case of a CROSSCUT saw, you will fine tune later. There are variations but for a conventional array settle on a series of equilateral triangles filed square and level across the axis of the saw. Use a file size appropriate to the size of tooth and gullet. For a RIP pattern file so that the rear cutting face of the tooth is at 90 degrees to the axis of the saw - in other words vertical - and maintain the file level. If repairing a poorly maintained saw with botched prior attempts at sharpening evident it might help to mark out a new line of gullet bottoms and file down to it. A fine 0.5mm felt tip pen is suggested. Do not use a scriber on the blade lest it encourage cracking.
Setting - using a saw set, set alternate teeth as desired. The degree of set can be varied if for instance the saw has a specific intended use. If you only expect to cut dry hardwood then minimise the set. As a rule less set assists with a more accurate cut.
Final Filing - in the case of a CROSSCUT blade the final shaping of the teeth involves filing at an angle across the blade and in some instances angling the file downwards as well. This introduces the concept of shear into the tooth and, as is the immutable trade off with all sharp edges working wood, it is a balance between durability and sharpness. The greater the so called fleam angle the more acute is the resulting edge and the faster it will cut. The sharper the edge the more sweetly it will cut and the sooner it will dull. A fleam angle of 10 degrees is about average. Final filing is the the skilled stage and it is most important to file the same angle and intensity when working each side of the saw. Bear in mind there will be a slight burr on the back side of the filed tooth so if you don't rotate the saw in the vice and work from one side only for both rows of teeth, all the burrs will be on one side of the blade and this can result in cuts that wander off line.
Test Cut - if you do have an unequal cut you can try dressing the blade by running a fine stone along the side to which the saw is tending to.
Wandering Cut - If the blade does not cut truly then it is likely to have a set or sharpening bias. One of the key skills when filing to not allow your naturally used hand to dominate - in other words file equally.
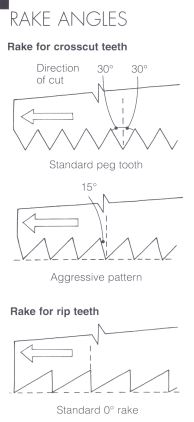
Graphics from "The Complete Guide To Sharpening" Taunton Press.
 |
 |
 |
| Item Code: B0502 | Item Code: T2500 | Item Code: T1708 |
 |
 |
 |
| Item Code: A0576 | Item Code: T2779 | Item Code: A0880 |
 |
||
| Item Code: E2178 |